Friday, September 11, 2015

Raising Pastured Poultry : Self Sufficiency


Every year, we try to move closer and closer to a self sufficient lifestyle. Although we have eaten a few of our chickens in the past, this year was the first year we decided to raise and process ALL of our own chicken. 
The first thing we needed to decide was which breed we would get. EVERYONE gets Cornish cross (CornishX). This is what breed most commercial facilities grow. However we wanted to get a breed which still packed the pounds on fast, but didn't have as many leg problems as the X's.  You see, X's grow so fast that their bones don't grow as quickly as their muscle. This causes pain when the birds stand, walk, or even move. So most of their time is spent sitting right next to the food and water sources. The breasts get bruised, the legs and wings break easily. (Have you noticed how every other wing or drumstick is severely bruised or broken?)  Chickens never used to be this way. 
It's simple, this breed is designed for super fast turn around, plain and simple. 

After some research, we decided on Cornish roasters, instead of X's. The nice thing is that at the time of our first batch, I was working at a larger operation where they raised pastured X's for a local restaurant. And since I was in charge of caring for the birds at both locations, this allowed me to see the exact differences between each of the varieties.
Cornish crosses are supposed to get to processing size at 8-9 weeks, while the roasters are supposed to reach the same weight at 12 weeks. 

So began the daily comparisons of the two farms.

The tractors I made for pasturing our birds cost me a little under $250.00 for both. I could have easily made them cheaper using recycled materials, but i chose to purchase treated lumber and make them to last as long as possible so that we could run many batches of birds through them to recover the costs. (Yes I know this will take a few years.)
The tractors are 3'9" by 7'9"
I designed the tractors to fit perfectly inside of my 4x8 utility trailer just in case I ever needed to transport these (or other) birds to a new location.  They make one hellavu transport cage. I even used one of them to pickup three feeder hogs that we raised throughout the spring and summer as well.

Once the chicks were feathered enough to come out of the brooder, I moved them to the tractors. With cool nights still looming, I chose to run a cord out and hang a heat lamp just in case. It didnt really take a lot of time, and reassuring that the chicks wouldn't freeze to death was well worth it.

Withing another week (week 5-6) the birds were moved to better pasture where they would have fresh grass under their feet every day.  The birds still need feed and water, but they supplement their diet by eating grass and bugs. They are allowed to scratch and claw at the dirt as they please which helps prevent them from pecking each other to death.

The tractors are moved daily to ensure fresh grass and also to provide a clean spot for the birds to lay. This also means that each time you move the tractor, the birds will be fertilizing a new spot.
If you look closely at the photo above, you can see the track marks of the cage on the left from having been moved each day. Within a week or so, the flat grass and chicken waste behind the tractors will have become overgrown, lush, and green.

This is just one of our birds which we processed at week 11.  (5.5 lbs)

So what was the difference between the two farms?
1) Our birds did take about 2-3 weeks longer to feed out that the X's, which meant a little more cost in feed. (I would say an additional 20% in feed
2) Our birds had very little bone breakage and minimal bruising
3) I noticed a huge difference in the activity of the two varieties. Our birds seemed to stand and walk around much more than the X's, which i'm sure had an impact on the lack of bruising, while the X's basically lay on their breasts all day long.  When walking, the X's seem to wattle back and forth a lot more because of the unstable nature of their structures.

To Our Little Backyard Farm, the additional cost of the feed was easily justified by our choice of breed. 
Having said that,  I do not discourage anyone from buying X's.  They grow fast and furious, and raising your OWN meat birds is a much healthier option than that store bought crap!


Friday, August 7, 2015

Homemade Mint Jelly Recipe


Now I have to admit,  I totally thought this was gonna be nasty.  I was very suprised to not only like this jelly myself, but my boy absolutely LOVES it.  Now I know, traditionally this jelly is used on lamb, and many people say cream cheese and crackers, but I think the best place for this concoction will be warmed up and drizzled on some ice cream.

Lets make this, shall we?

What you will need:
-1 1/2 cups of fresh mint leaves
3 1/4 cups of water
1/2 tsp lemon juice
1 (1.75 oz.) box of pectin
4 cups of sugar
and 
2-3 drops of green food coloring (technically optional)


Crush the leaves and boil them in the water for about 5 minutes. after turning off the burner, let the pot steep for about 10 more minutes.

Strain the mint infused water to remove all of the leaves, leaving only the liquid. The liquid will be a lightish, greenish, brownish. 

Replace that liquid to the burner. Stir in 2-3 drops of green food coloring if you choose to.  You may certainly omit this part, but then the jelly isn't nearly as cool as mine is.

 Stir in the box of pectin and the lemon juice as well.

Just before the liquid begins to boil, dump in the 4 cups of sugar and keeeeeeep mixing.

After you have reached one minute of a rolling boil,  turn the burner off and let the pot sit for a minute or two. 

All of the foam will rise to the top and cool, allowing you to easily skim it off with a spoon.

Then ladle into your pre-heated jars and process them for 8-10 minutes in a water bath.

Oh my god,  you seriously thought this was gonna be a lot harder didn't you?

ENJOY!!!!!


Wednesday, June 17, 2015

Harvesting Kale : All Season Long


Kale is one of my favorite greens to grow. While showing people around Our Little Backyard Farm I am always amazed at how many people are surprised at how I harvest my kale.  Many people see kale as a lettuce type of green and will typically harvest the whole plant similar to a head of leaf lettuce. While it is perfectly fine to do it that way,  that would require successive plantings in order to continue harvesting tender greens for longer than a few weeks at most.  
Instead of successive plantings, let me explain an easier method.  
A kale plant, if allowed to grow for an entire season, will get between two and 3 feet tall. The leaves on the bottom will have been browning and falling off, the middle would be light green with tough leaves and the top few leaves would be tender. (And of course a mix of those traits in between)


You can get by with only a half dozen kale plants in the garden if you are only feeding your family.
After the plant has grown to a size where the leaves appear ready for harvest, take a blade and begin removing the leaves from the bottom up. Some people bend and snap the leaves which leaves a small stem remaining on the plant. This is just a place where bugs can hid out, so I like to cut close to the stem instead.  Notice I said "close".  
Continue taking leaves until there are only a few leaves remaining on the plant.  Now all of the energy will go into growing just a few leaves, instead of a whole plant, There will be less places for bugs to hide out, and you will never have to harvest anything but tender leaves. (Providing you keep up with harvesting)


This last picture is what the plant should look like after harvesting for the day.  The stem will continue growing taller and stronger giving the appearance of tiny palm trees. The best part is.....by the end of the season, you will be harvesting at waist height instead of ground level. Win Win Win!


Saturday, June 13, 2015

Pastured Pork : Cheap and Easy


Pasturing Pigs is probably the most cost effective way to raise pork.  Contrary to what many believe,  you do not need to have a solid wall, made of brick, stone, or expensive livestock panels to raise pork.  In fact,  the paddock we built required an investment of  about $140.00 total. 
All that is needed to keep this future bacon contained is a single strand of hot wire fence.  (I use two,  just in case, but one is all that is needed) Having worked at a farm where we did this on a more commercial scale,  I can attest to the fact that this works GREAT!.
I helped to build paddocks for breeding stock as well. Most of the sows went well over 500-600 pounds. One single strand of 14ga. electric fence kept them in check at all times.

There is also another benefit to pasturing instead of confinement.  The SMELL!  It is barely a fraction of what you would smell commercially,  if you can even smell it at all.
Sometimes when we walk down to the pasture, my wife might catch a whiff of manure, but typically, the stench is non existent at Our Little Backyard Farm. (Keep in mind, it is only 3 acres)

When pasturing,  pigs are free to do what pigs do.  They will root up all kinds of food, and even trash that you never new was there. They will supplement their diet with wild forage and I guarantee you will notice the difference in taste from pork raised in confinement.

The first week or two WILL require a partial containment while the pigs are being trained to the hot fence.  During the first day,  you will hear a bit of popping and squealing.  But after after a few days or a week, they will be few and far between.  


The reason for the partially contained paddock as the picture below shows, is that you will need to run a small stretch of electric fence about 2-4 inches away from the walls as a training line.  Young pigs,  when hit by the fence, will typically try to run THROUGH it, instead of backing away.  The wall behind the wire, prevents the breakthrough and trains them to jump back when hit.
Since the pigs are very small at this stage,  the need for a very strong wall behind the wire is not warranted.  We just happened to have this stronger pen available from a time when we raised pork from start to finish in the same pen. Now, they only spend a few weeks in it.


 After a few weeks of training, the pigs are ready to go to pasture.  You can either move them with a trailer, or try to walk them.  I will express a great deal of caution at this stage.  When you open the pen,  the pigs have been used to a wire containing them (not the wall behind it)  Even when you take down a wire,  it can take time for the pigs to muster up the courage to "break" the imaginary boundary.  Food sometimes helps to coax the timid ones, but typically, TIME is the only thing that really works.  They will go when they are ready. Pushing them will spook them and make this step much, much harder. Just relax and chill while they do their thing.
Having food and water already in the new paddock will help hold them tremendously, especially if they can see it.

 The need for fancy posts and fencing is not required when it comes to electric fencing. I use 10' sticks of rebar, cut down to 3 1/3' and even saplings, and small trees for corner posts. the reason I like rebar is that I can buy the adjustable wire connectors and slowly raise and lower the lines when needed. The wire should always be at the pigs "eye level" 


Depending on the number of pigs you have, or the amount of space they have in the paddock,  you may have to build more than one in order to allow rest time for the pasture to regrow. 
Obviously putting them side by side is the best option for this, and by utilizing handles such as the ones below, you can drop the lines, move the food and water, and let them take their sweet time without having to oversee the process this time. Later, after the pigs have finally braved the boundary, you can replace the handle so that they cannot return to the healing paddock. 

                                      
Our paddock is about 1/2 to 3/4 of an acre and is divided equally between tall grass meadow and timber.  The pigs LOVE the timber. The point is, as long as there is forage for them to eat, it doesn't matter what type of landscape you have,  the pigs will adapt. However, if all you have is open field, you do need to provide at least a covered area where they can retreat from the midday sun and storms. 
Well there you have it.
Who new that raising pork could be so simple.


Friday, January 30, 2015

DIY Goat Milk Soap: Cold process


I have made quite a few batches of soap now, so I feel that I can blog this with a tiny bit of authority on the subject. It took me a long time to muster up the courage to attempt this feat because everything I had read about soap making made it sound like EVERY aspect of it was critical to a capital T. 
Not my experience at all.  
In fact, I have found soap making to be even more forgiving than my wife...(I know, I know.....couch!!!!)
Having said that, and fully expecting a splurge of comments about how "wrong" I am, let me just say this.  I have never made hot process soap, probably never will, and don't really care about how 2 degrees F can make or break your precious fifteen dollar a bar soap.  
This is Our Little Backyard Farms "almost famous" much cheaper soap.

So lets make some, shall we!!!

What your gonna need:
-12 oz. of goat milk (frozen)
-12 oz. solid vegetable shortening (lard of some sort)
-5 oz. coconut oil
-4 1/2 oz olive oil
-3 oz. lye (granular food grade is best)
and
any optional additives (oat meal, lavendar, colorants, pumice, etc.)

OH, and by the way....where gloves and EYE SAFETY!!! 
I was a "man" when I did my first few batches and was too cool for safety glasses, but when a little drop splashed on my arm during the blending process, I realized by THE BURN, that I didn't really want it to get in my eyes.


First put the shortening, coconut oil, and olive oil in a small pot and heat up on the stove (on LOW) until melted. Try not to let it get too hot. 
TIP: I typically turn the burner off after it gets about 1/3 melted and leave it for a few minutes. Then turn the burner back on to finish. This prevents the oils from getting too hot.

When oils are melted, set pot aside.  In a separate bowl, slowly sprinkle the lye onto the frozen goat milk while continually stirring. The milk will immediately begin to melt.  I like to use small ice cube trays to freeze my goat milk, so that when I am ready to make soap, I can just pop out a bag of frozen cubes and weigh the appropriate amount. It also helps to melt quicker with the lye.  If there was ANY critical step, this would be it.  The longer the lye is in the milk prior to the other ingredients being added, the better the chance of the milk turning a nasty brown color.


This was after only about a minute and a half of the lye melting the goat cubes.


Once the milk has been melted, pour in the warm oils. 


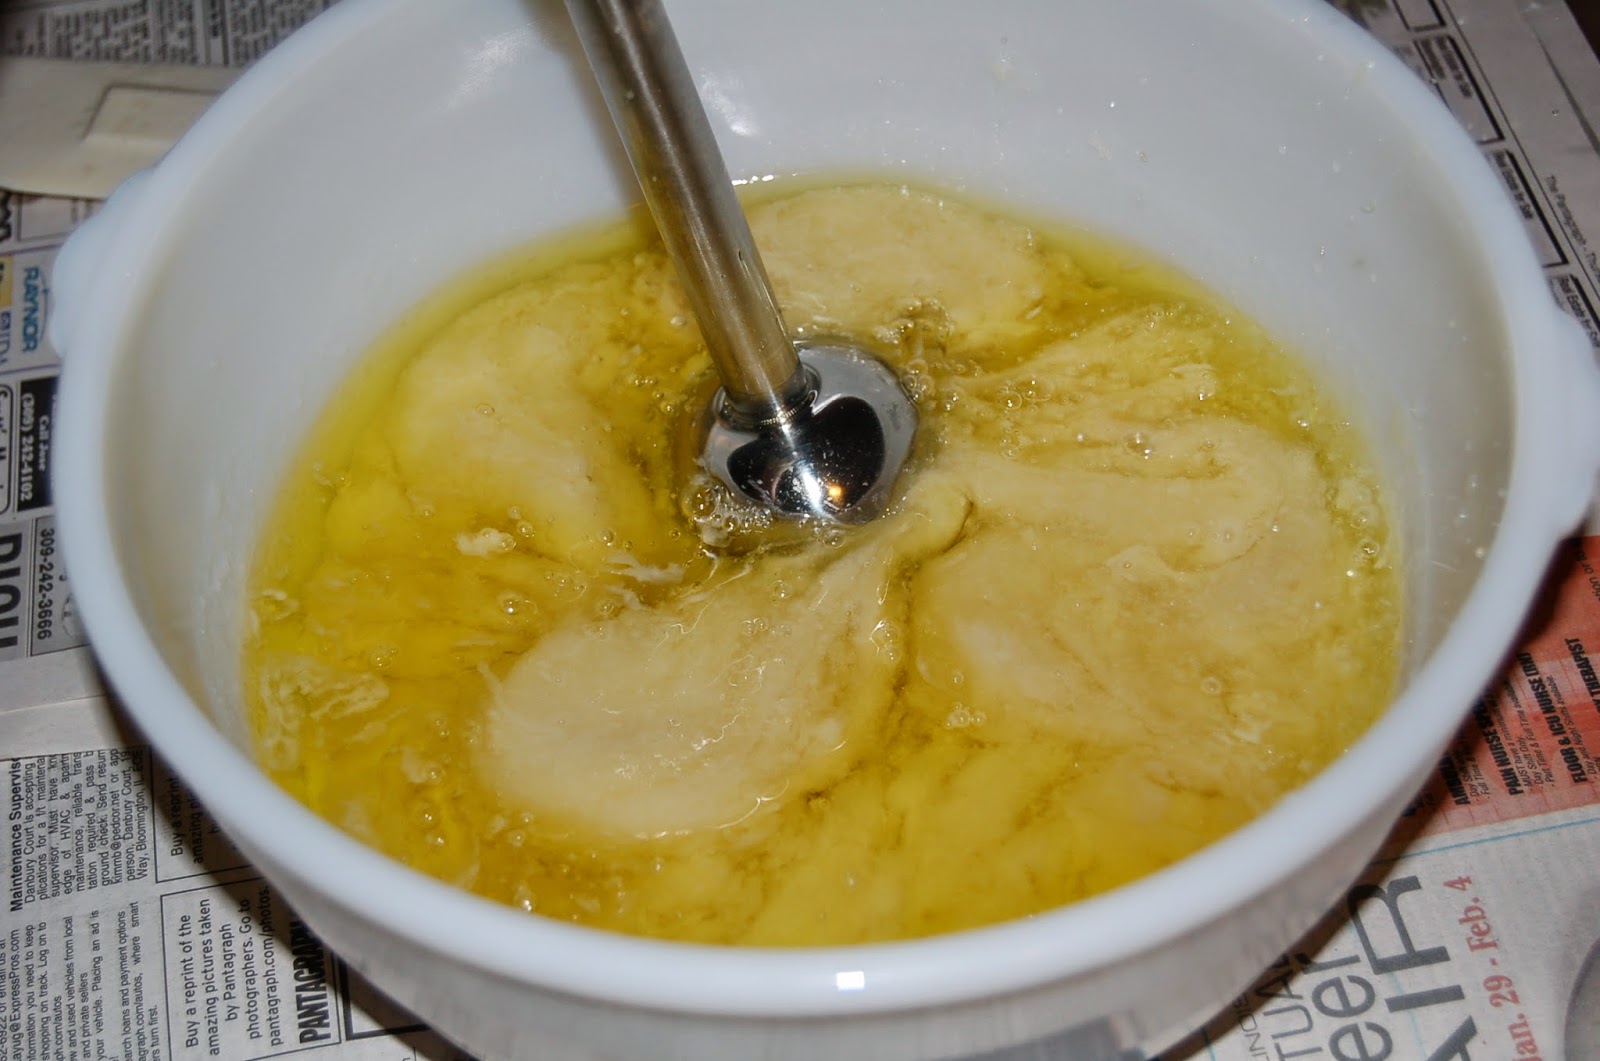
Although you don't "have" to have an immersion blender (the oldschoolers didn't),  Why the heck would you not.  They make this next task so easy.  The mixture needs to be blended quickly to form a trace.  Now,  what is trace? Read on.


Trace is when the mixture leaves a standing trail, similar to that of a pudding consistency, when you lift the stirring utensil out of the mixture. (such as the picture above)

Basically the soap is done,  You could stop here and pour it into a mold,  but what's the fun in that. Lets put some goodies into it.  In this picture, I used Oatmeal which I ground up in a chopper, and also dried basil (first time with this) to add scent, and flecks of green in the soap.  I have also added lavendar, and synthetic colorants in the past.  I probably won't do synthetics any more, as I have ben researching natural colorants such as the dried herbs. 


Mix in all additives with your spatula 

Pour the mixture into a mold.  You can make your own molds using parchment paper or wax paper, but I find the silicone molds to be SOOOOO asy to use and clean.

Put the mold up and out of reach from pets or children since the lye can still be very harmful at this stage, and let set up for about 24 hours.

After 24 hours, you should be able to remove the soap from the mold. Some molds are already shaped into individual bars, however the one I use is just a block which has to be cut into bars.

You can use a butter knife to cut the bars, or you can spring some small cash for a handy dandy little soap cutting do-dad like the one pictured here.

After you cut the bars, let them dry (turning daily for the first week, every other day for a few more) for at least 3 weeks.  If you don't, the soap will not cure enough and will shrink quickly when uses. Also, if you use it too quickly, the lye may irritate your skin and cause burns.

Did I mention...Where gloves and SAFETY GLASSES.....good. 
Now get busy and make some soap!!!!

Sunday, December 21, 2014

DIY: Homemade Bacon


Very few things can make a person wake up and smile like BACON!
Little did I know, it is fairly simple to make.  The hardest obstacle to overcome for me, was waiting for the brine because it took 2 days. (I am very impatient when it comes to my bacon.)
Here goes!

Besides the meat, you will need the following:
Kosher Salt
Light Brown Sugar
and 
Course Ground Pepper


For the meat, you will need to pick up a pork belly. We got ours at the local butcher shop. Ours offered a 12 pound side, but we chose to have them cut it down to 6 pounds (actually weighed 6.5#)

I cut the side down into more manageable sections that fit easily into some of our containers which we planned to use for the brine solution.

In a separate container, Mix 1 gallon of water, 3/4 to 1 pound of kosher salt, and 1 to 1 1/2 cups of light brown sugar until it is all dissolved.

pour the brine into the containers.
TIP: I used small wooden skewers broken into short sections, to help prevent the meat from floating. This essentially forced the meat to hover in the brine, creating maximum soakage. (My word, lemme have it)

This was the hard part....
Put the containers in the fridge for the next 48 hours. (stirring the brine half way is suggested, but we didn't do it)

Once the brine has done it's job, rinse the meat under cool water for about 30 seconds. Then pet the meat dry and place on a rack, or tray.

This is when you put on the ground pepper. Be liberal here. Remember that when sliced, each piece will only have a small bit of what you have put on it. 
A little does NOT go a long way.
A LOT goes a long way. 

Now the fun part. Smoking.
We chose to cold smoke the meat. The heat should be between 80 and 120 degrees F. (ours stayed at about 90-100 the entire time.
Using my highly sophisticated OLBF redneck smoker made from a 55 gallon drum, coffee cans, soup cans, an old grill grate, and an old camping stove that runs on the inky dinky little propane tanks, I used a bunch of hickory chips to help add the scrumptious flavor of our bacon.

After smoking the meat, allow it to cool to room temperature before cutting. 
Now,.....to everyone else who has a meat slicer,  I am ENVIOUS....
But for the rest of us, slicing bacon with a knife is not that hard, you just need a few tricks.
Here they are:
First,  have a SHARP knife.
Second, keep it sharp (sharpen often)
Third, place the meat in the freezer for a bit to stiffen up before slicing
Fourth, sharpen the knife again!!!!!!

Lastly,  before you finish slicing all of the bacon, throw a few strips into a skillet to begin enjoying the fruits of your labor.
Thanks for checkin' out OLBF. Please like us on facebook
https://www.facebook.com/pages/Our-Little-Backyard-Farm/231536597000914

Monday, October 13, 2014

How to make goat butter

Goat butter is Sooooo easy. And we have yet to invest in a cream separator.  
But before I continue, I do have to disclose that we own Nigerian Dwarf  goats. Unlike most goat breeds, they consistently have about a 6% butterfat content in their milk. At certain times of the year, they are known to be even higher (around 8-9%) 
I only say this because I know many people who have told me that it is "impossible" to make goat butter. They say it is too hard because they cannot separate the cream from the milk.
 Another acquaintance stated that she could easily separate the cream, but didn't make butter because she didn't want to "waste" all of the skim milk after separating.
WASTE?....I think not. 
Personally, after separating the cream out, we use the skim milk for making goat milk soap, but you can also feed it to chickens and pigs. (I'm sure there are a few other options too!)
All you need to make the butter is 
-Goat Milk
-A mason jar
&
-a bulb turkey baster


Now, I did state that we don't use a cream separator, but I didn't take any pictures of how we gather the cream, so this is how we do it.
1) I filter the milk straight into a mason jar (usually quart size, but size doesn't matter)
2) I place the covered jar of fresh milk in the fridge for 2-3 days
3)I carefully take the jar out of the fridge trying not to shake or disturb it a lot.
4) using the baster, I slowly suction the cream off of the top and work my way down.
(about 1/6 th of the way down) (sometimes it takes a few go's at it)
5) I squeeze the cream out into a separate quart sized mason jar until it is half full
(You can freeze the cream if you don't have enough)

I have read that some people use large flat trays to separate the cream, and then "skim" the top, but I prefer to use a taller cylindrical container (I't makes for easy suction)
If you get a little extra milk, it doesn't hurt it when you make the butter (you will just get less butter)

This is my jar of Cream which I have already separated from the goat milk. The skim milk was used for goat milk soap. 
I had to collect this cream for about 3 days, so I just froze it each day until I had enough.
When I was ready to make the butter, I removed the jar from the freezer to allow the cream to get to room temperature  before I began.

To make the butter is easy. Just shake the jar. and then Shake it some more.....and some more....then recruit someone else to help shake it.....
We usually shake the cream for about 15-20 minutes before we get our butter.

You can open the lid and look inside to see the globules of butter forming and sticking together. Typically they form a sort if disc shape in the center of the jar. The butter will be floating on top of the .....buttermilk.  Mmmmmmmm

 Here you can see from the side of the jar how much butter there is floating on top of the buttermilk. It is kind of hard to see, but if you let the jar sit for a minute after shaking, it will settle some and allow you to make the distinction.

Slowly drain the buttermilk into another container. The butter, while floating, will usually stay to the back as the buttermilk drains out.

Here is the cream separated into butter and buttermilk. We use the buttermilk for making pancakes or other cooking projects. 

The butter will still have some buttermilk in and on it, so it must be rinsed to prevent souring. I use cold water (which will help to harden the soft butter)

Pour out the milky water carefully. The first time you lose your hard work down the drain, you will pull your hair out. 

Here you can see a cloudy mess of water under the butter.

Continue to rinse and drain the butter until the water pours out clean and clear. Work slowly....This is not a time critical mission.

After the final rinse, I use my finger to help hold the butter back while I drain every last bit of water out of the jar. 

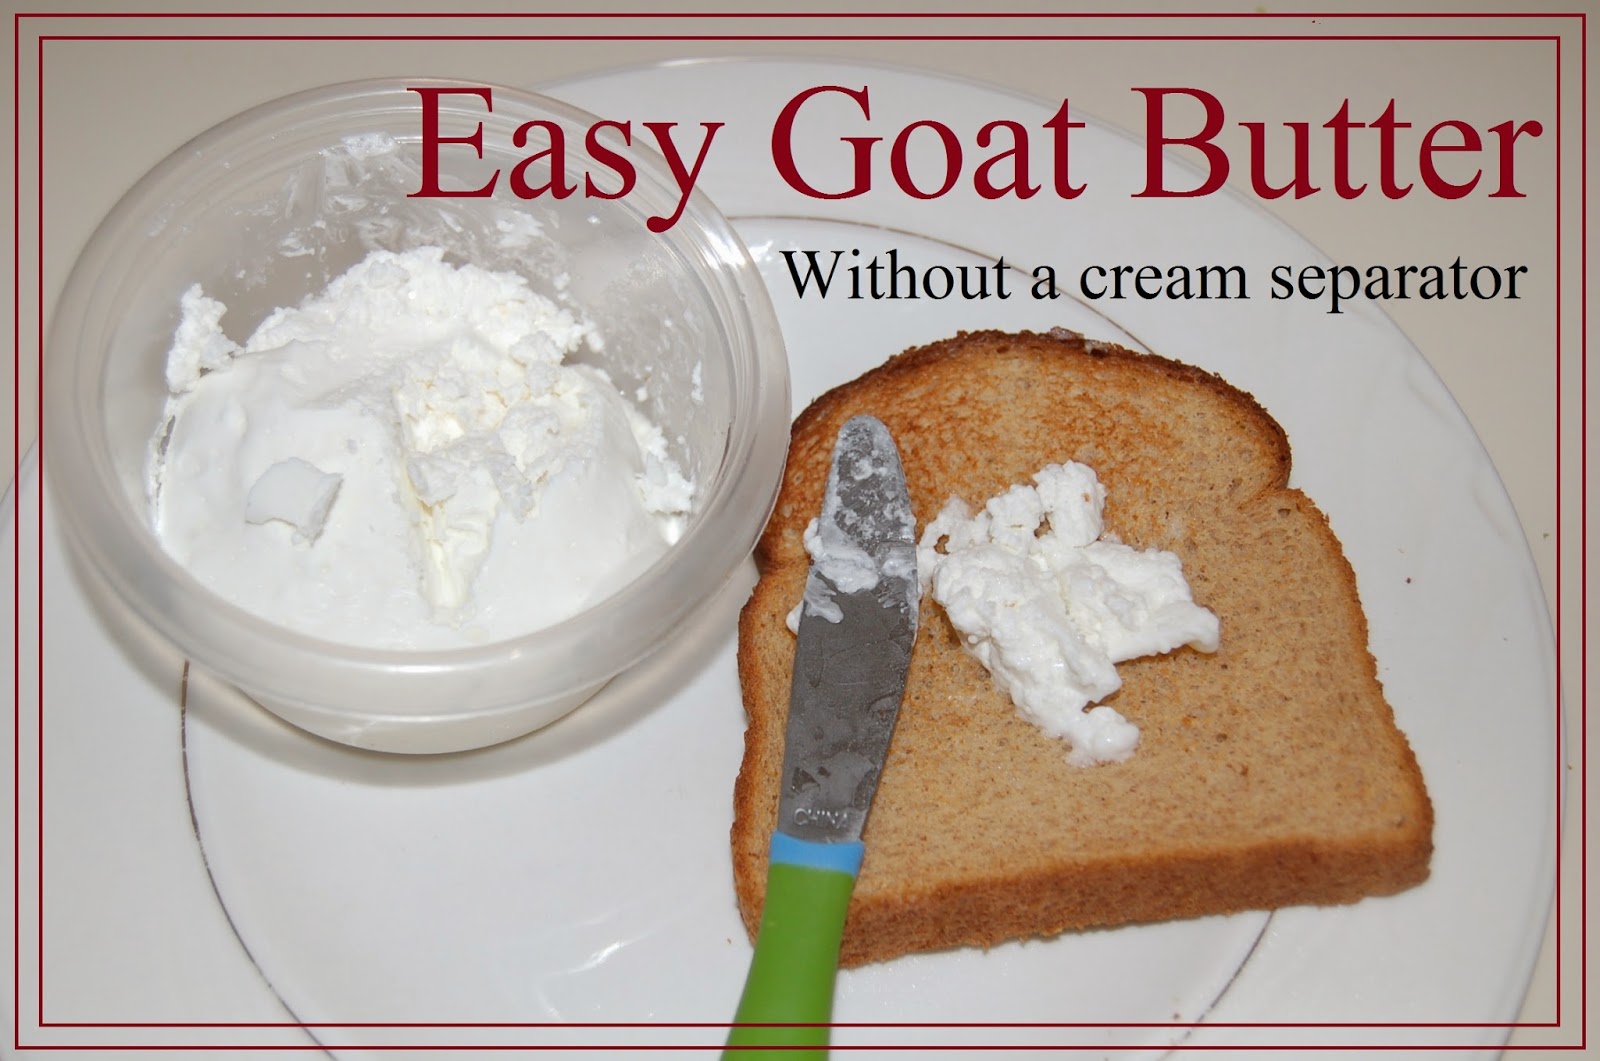
Then I pour the butter, which is fairly soft, directly into the container I will keep it in the fridge.  The picture below shows the different texture the butter will have once it has been allowed to cool off in the fridge and become hard. 

We keep our butter salt free, but of course if you want to add salt, you should mix it into the butter while it is soft (just before putting it in the fridge)
Butter is EASY.....NOW GO MAKE SOME!!!!!!!!

Thanks from Our Little Backyard Farm